Embarking on a journey with a camera in hand opens up a world of possibilities for creating lasting memories. Travel photography allows you to freeze time, capturing the essence of a place and the emotions it evokes. Whether you’re an amateur enthusiast or a seasoned pro, mastering the art of travel photography can transform your trips into visual stories that transport you back to those cherished moments.
The key to exceptional travel photography lies in understanding your equipment, honing your compositional skills, and developing an eye for the unique and beautiful. It’s about more than just pointing and shooting; it’s about immersing yourself in the environment and capturing its spirit through your lens.
Mastering camera settings for dynamic travel scenes
To truly elevate your travel photography, it’s essential to move beyond automatic mode and take control of your camera’s settings. This knowledge allows you to adapt to various lighting conditions and capture the dynamism of your surroundings with precision.
Optimizing aperture for depth of field in landscape photography
Aperture plays a crucial role in landscape photography, determining how much of your scene is in sharp focus. For expansive vistas, you’ll typically want a large depth of field to ensure everything from the foreground to the distant horizon is crisp. This is achieved by using a smaller aperture (higher f-number) such as f/11 or f/16.
However, don’t be afraid to experiment with wider apertures to create a sense of depth. For instance, when photographing a field of flowers, you might use an aperture of f/2.8 to blur the background, drawing attention to a single bloom in the foreground.
Shutter speed techniques for capturing motion in bustling markets
Vibrant markets are a staple of travel photography, teeming with life and movement. Your choice of shutter speed can dramatically affect how you portray this energy. A fast shutter speed of 1/500th of a second or higher will freeze action, capturing sharp images of vendors and shoppers in motion.
Conversely, a slower shutter speed can create a sense of hustle and bustle. Try using a shutter speed of 1/15th to 1/30th of a second to introduce motion blur, conveying the frenetic pace of market life. Remember to use a tripod or steady yourself against a stable surface to avoid camera shake.
ISO management in challenging lighting conditions abroad
Traveling often means encountering less-than-ideal lighting situations. Whether you’re exploring dimly lit temples or shooting after sunset, understanding ISO is crucial. Increase your ISO to maintain a fast enough shutter speed in low light, but be mindful of the trade-off between higher ISO and increased digital noise.
Modern cameras handle high ISOs remarkably well, so don’t hesitate to push to ISO 3200 or even 6400 if it means capturing a moment that would otherwise be lost. In post-processing, noise reduction techniques can help mitigate any unwanted graininess.
RAW vs JPEG: choosing the right format for Post-Processing flexibility
When it comes to file formats, RAW provides unparalleled flexibility for post-processing. RAW files contain all the data captured by your camera’s sensor, allowing for extensive adjustments to exposure, white balance, and color without degrading image quality.
While JPEGs are more convenient and take up less space, they offer limited editing potential. For travel photography where you might encounter varied and challenging conditions, shooting in RAW ensures you have the best possible starting point for crafting your final images.
Composition strategies for iconic landmark photography
Capturing iconic landmarks in a way that stands out from countless other photographs requires creativity and a keen eye for composition. By applying tried-and-true compositional techniques, you can create images that are both visually striking and uniquely yours.
Rule of thirds application at the taj mahal and eiffel tower
The rule of thirds is a fundamental principle in photography that can dramatically improve the impact of your images. When photographing the Taj Mahal, for example, try positioning the main dome at one of the intersection points of an imaginary 3×3 grid overlaid on your frame. This creates a more dynamic and engaging composition than centering the structure.
For the Eiffel Tower, consider placing the horizon line along the bottom third of the frame, allowing the tower to soar into the upper two-thirds. This emphasizes the tower’s height and creates a sense of majesty. Remember, the rule of thirds is a guideline, not a rigid rule—feel free to break it when your creative instincts dictate.
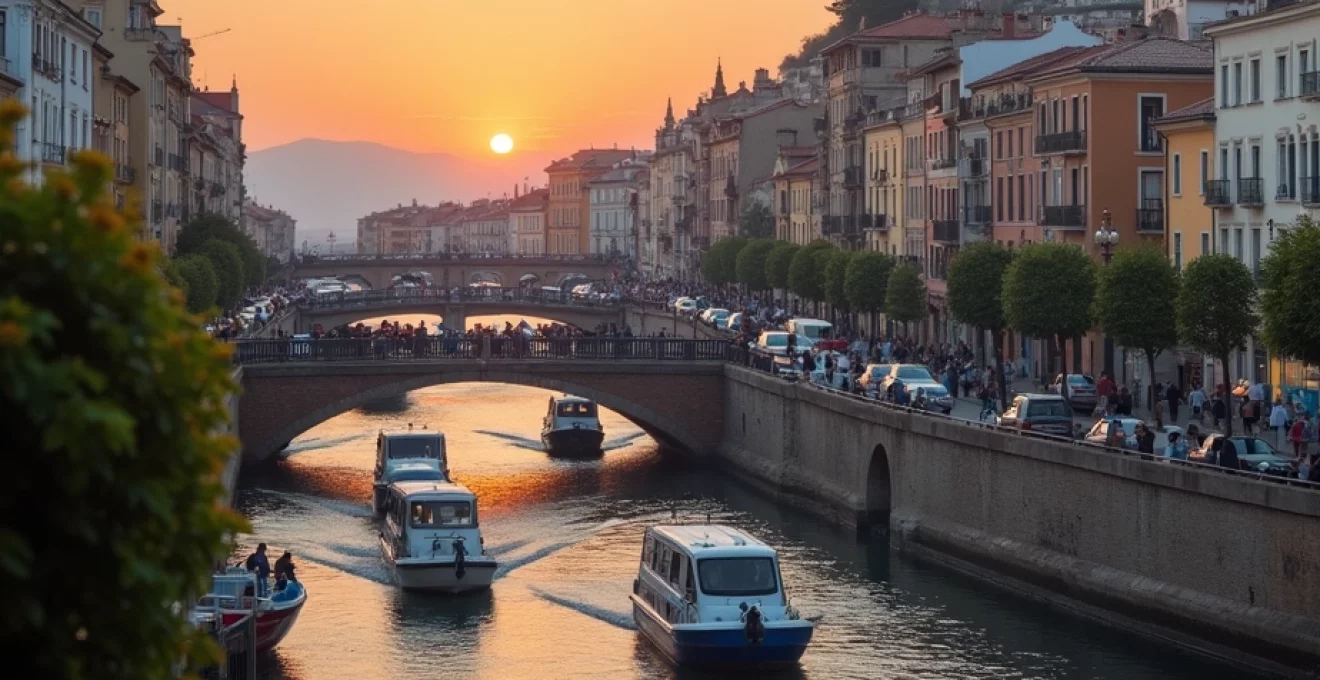
Leading lines techniques in urban architecture: barcelona’s sagrada familia
Leading lines are powerful compositional tools that guide the viewer’s eye through an image. Barcelona’s Sagrada Familia, with its intricate facades and soaring spires, offers numerous opportunities to employ this technique. Use the vertical lines of the towers to draw the eye upward, or capture the diagonal lines of the roof to create a sense of movement and depth.
In urban environments, look for natural leading lines in streets, sidewalks, or even rows of streetlights. These elements can lead the viewer’s gaze towards your main subject, creating a more engaging and dynamic photograph.
Framing natural wonders: grand canyon and great barrier reef perspectives
Natural frames can add depth and context to your photographs of iconic landscapes. At the Grand Canyon, use the gnarled branches of a juniper tree to frame the vast expanse of the canyon, providing a sense of scale and adding foreground interest. This technique not only guides the viewer’s eye but also creates a more intimate, personal perspective of the grand landscape.
For underwater photography at the Great Barrier Reef, look for natural frames created by coral formations or schools of fish. These elements can enclose your main subject, drawing attention to the vibrant marine life while still conveying the vastness of the underwater world.
Essential travel photography gear and packing tips
Selecting the right gear for your travels is a delicate balance between preparedness and portability. The key is to choose versatile equipment that can handle a variety of shooting situations without weighing you down.
Lightweight tripods for stability: comparing manfrotto befree and peak design travel tripod
A reliable tripod is indispensable for travel photography, enabling sharp images in low light and allowing for creative techniques like long exposures. The Manfrotto Befree and Peak Design Travel Tripod are both excellent options for the traveling photographer.
The Manfrotto Befree offers a great balance of stability and portability, weighing just 1.4 kg (3 lbs) while supporting up to 4 kg (8.8 lbs) of gear. Its quick-release leg locks and ball head make setup a breeze. The Peak Design Travel Tripod, while pricier, boasts an innovative design that packs down to the size of a water bottle. It’s slightly lighter at 1.27 kg (2.81 lbs) for the aluminum version and can support up to 9.1 kg (20 lbs).
Versatile zoom lenses: sony 24-70mm f/2.8 GM vs canon RF 24-105mm f/4l IS USM
A versatile zoom lens can cover a wide range of shooting scenarios, reducing the need to carry multiple lenses. The Sony 24-70mm f/2.8 GM is renowned for its exceptional sharpness and fast aperture, making it ideal for low-light situations and achieving shallow depth of field. However, it comes at a premium price point and weight.
The Canon RF 24-105mm f/4L IS USM offers a broader zoom range, extending to 105mm for more reach. While it has a slower maximum aperture, it compensates with built-in image stabilization, which is particularly useful for handheld shooting in challenging light. It’s also lighter and more affordable, making it an attractive option for travel.
Weather-sealed camera bodies: nikon Z6 II and fujifilm X-T4 for diverse climates
When traveling, your camera may be exposed to a variety of weather conditions. Weather-sealed bodies provide peace of mind and allow you to keep shooting in less-than-ideal situations. The Nikon Z6 II is a full-frame mirrorless camera with robust weather sealing, excellent low-light performance, and a comfortable ergonomic design.
The Fujifilm X-T4, while featuring a smaller APS-C sensor, offers exceptional weather resistance in a more compact body. It also boasts in-body image stabilization and Fujifilm’s renowned color science, making it a favorite among travel photographers who prioritize portability without sacrificing image quality.
Portable storage solutions: western digital my passport wireless SSD review
Reliable storage is crucial when you’re away from home. The Western Digital My Passport Wireless SSD offers a compelling solution for photographers on the go. This portable drive not only provides fast, solid-state storage but also includes built-in Wi-Fi and an SD card reader, allowing you to back up your photos without a computer.
With capacities ranging from 250GB to 2TB, you can choose the size that best fits your needs. The device also features a long-lasting battery, making it ideal for extended trips where power sources may be limited. Its rugged design provides protection against drops and bumps, ensuring your precious memories remain safe throughout your journey.
Post-processing workflows for travel imagery
Post-processing is where you can truly bring your travel photographs to life, enhancing the mood and atmosphere you experienced in person. With the right techniques, you can transform good images into great ones, creating a cohesive and impactful travel portfolio.
Adobe lightroom presets for enhancing golden hour shots
Golden hour light is prized by photographers for its warm, soft quality. Adobe Lightroom offers powerful tools to enhance these magical moments. Creating custom presets can streamline your workflow and ensure consistency across your golden hour images.
Start by adjusting the white balance to emphasize the warm tones, then increase the vibrance slightly to make colors pop without appearing oversaturated. Use the graduated filter tool to add a subtle warm glow to the sky, and consider reducing highlights and lifting shadows to balance the dynamic range. Save these settings as a preset for quick application to future golden hour shots.
Capture one’s advanced color grading for cultural festival photos
Cultural festivals are a riot of color, and Capture One’s advanced color grading tools are perfect for bringing these vibrant scenes to life. The Color Balance tool allows you to adjust colors in the shadows, midtones, and highlights independently, giving you precise control over the mood of your images.
For festival photos, try enhancing the saturation of specific color ranges using the Color Editor. This can make traditional costumes and decorations stand out without affecting skin tones. Experiment with the Clarity tool to add definition to textures and details, but be cautious not to overprocess, which can lead to an unnatural look.
Focus stacking techniques in photoshop for intricate architectural details
Architectural photography often requires both wide depth of field and sharp details. Focus stacking in Photoshop allows you to combine multiple images taken at different focus points to create a single image that’s sharp throughout.
To focus stack in Photoshop, start by taking a series of photos with different focus points, ensuring your camera remains perfectly still (using a tripod is essential). In Photoshop, use the “Load Files into Stack” command, then select all layers and choose “Auto-Blend Layers” with the “Stack Images” option. This automatically aligns and blends the images, resulting in a photo with exceptional depth of field and detail.
Ethical considerations in travel photography
As travel photographers, we have a responsibility to approach our craft with respect for the places and people we encounter. Ethical considerations should always be at the forefront of our minds, guiding our decisions and interactions.
Respecting local customs: photographing religious sites in southeast asia
When photographing religious sites in Southeast Asia, it’s crucial to be aware of and respect local customs and traditions. Many temples and sacred places have specific rules regarding photography, dress code, and behavior. Before visiting, research the customs of the area and the specific site you plan to photograph.
In Buddhist temples, for example, it’s often considered disrespectful to photograph Buddha statues directly or to point your feet towards religious objects. Always ask permission before photographing monks or worshippers, and be prepared to put your camera away if requested. Dressing modestly and removing shoes when entering temples are common requirements that show respect for the local culture.
Obtaining model releases: street photography ethics in european cities
Street photography in European cities can capture the essence of urban life, but it’s important to navigate the legal and ethical considerations surrounding photographing people in public spaces. While laws vary by country, obtaining model releases is good practice, especially if you plan to use the images commercially.
When approaching subjects for street portraits, be transparent about your intentions. Explain how you plan to use the photos and offer to share the images with them. Some photographers carry small business cards with their contact information to give to subjects. Remember that even in public spaces, people have a right to privacy, and it’s ethical to respect requests not to be photographed.
Environmental impact: drone photography regulations in national parks
Drone photography has opened up new perspectives for landscape photography, but it comes with significant responsibilities, especially in sensitive environments like national parks. Many national parks worldwide have strict regulations or outright bans on drone usage to protect wildlife, preserve the natural soundscape, and ensure visitor safety.
Before flying a drone in any national park, thoroughly research the specific regulations of that park. In the United States, for example, drone use is prohibited in all national parks unless specifically permitted for research or other authorized purposes. When drone use is allowed, follow best practices such as maintaining line of sight, avoiding wildlife, and respecting the privacy of other visitors. Always prioritize the preservation of the natural environment over getting a shot.
By adhering to ethical guidelines and respecting local regulations, you not only protect the environments and communities you photograph but also contribute to a culture of responsible travel photography. This approach ensures that future generations of photographers and travelers can continue to enjoy and document these precious locations.